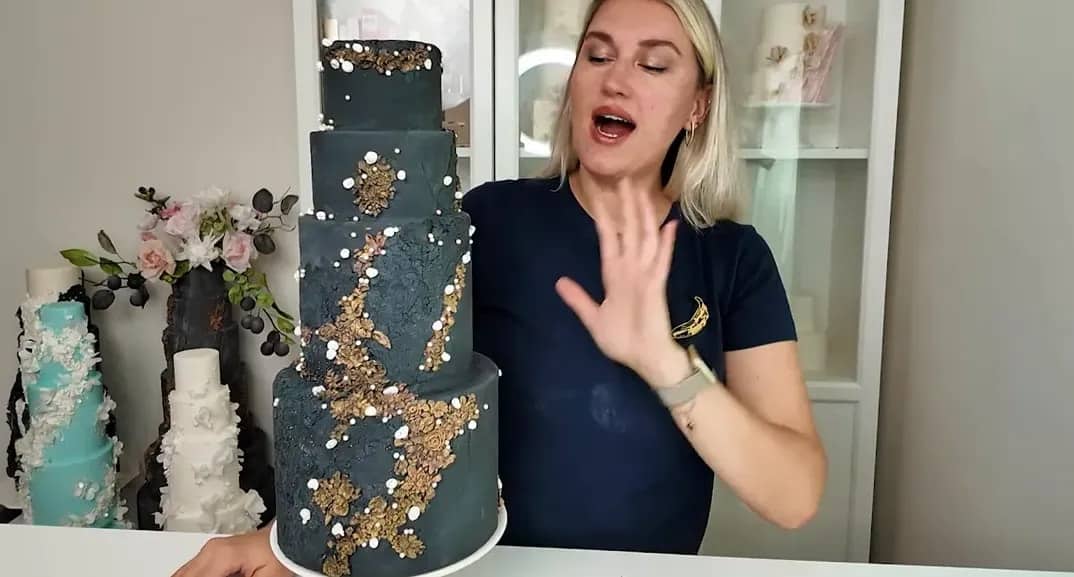
If you are a wedding cake designer and you need a bold cake for an outdoor wedding, this is a smart way to build it.
This design uses a dummy cake, black fondant, rough stone texture, bas-relief details, and gold and shimmer painting.
It is a strong approach for a wedding cake designer who wants the look of a dramatic display cake while keeping the real servings safe.
For this cake, the dummy is used because the wedding is outside, and in summer heat that matters. The real cake is already baked, assembled, and in the fridge. The dummy cake is made to match the design, while kitchen cakes or a cutting cake cover the same number of servings.
Why use a dummy cake for this design
Sometimes the issue is not design.
It is structure.
It is weather.
It is setup.
For an outdoor wedding in a hot climate, a dummy cake can make the whole process easier. The display keeps its shape, the design stays clean, and the servings are handled separately.
That is a practical decision for a wedding cake designer, especially with a dark fondant finish and added texture.
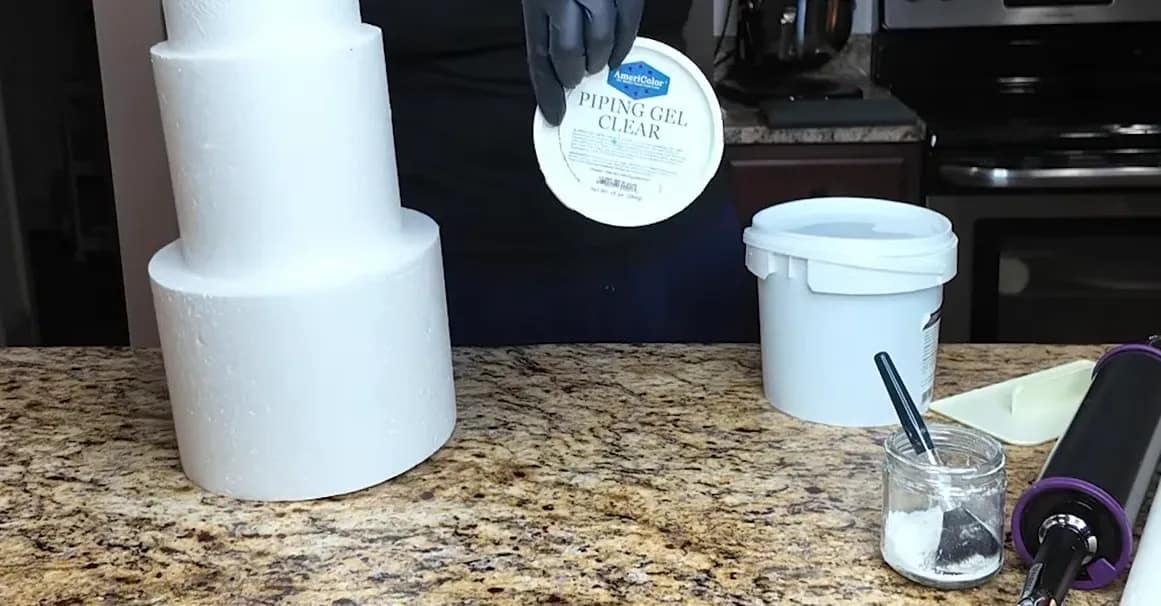
How the dummy cake is prepared
The dummy tiers are already assembled.
They are secured with bamboo skewers and a touch of piping gel.
That gives you a stable base before any fondant goes on.
Then the cake is set aside while the fondant is prepared.
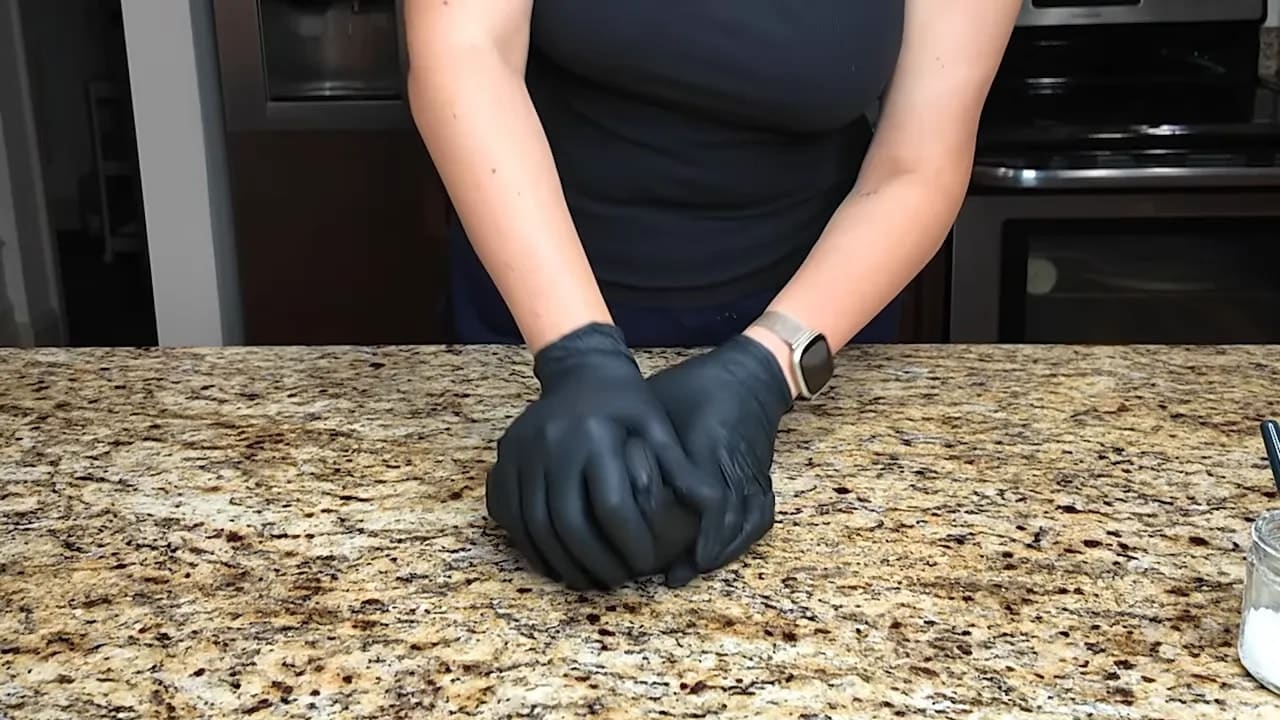
Preparing the black fondant
The fondant used here is black Satin Ice.
Start with about a third of the package and work it first.
The goal is simple:
- make it stretchy
- reduce elephant skin
- help it dry faster on the dummy
To speed drying, add a touch of tylose powder and mix it in.
This is one of those small steps that makes a big difference for a wedding cake designer working on a dummy cake.
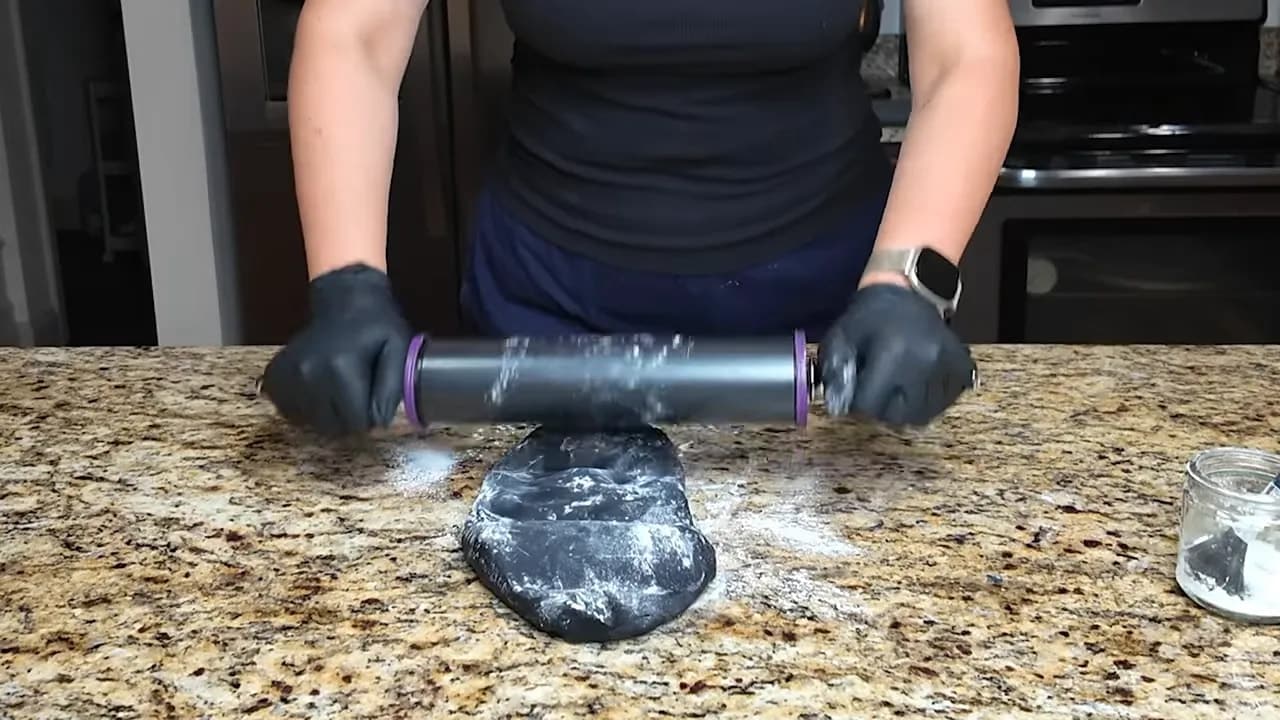
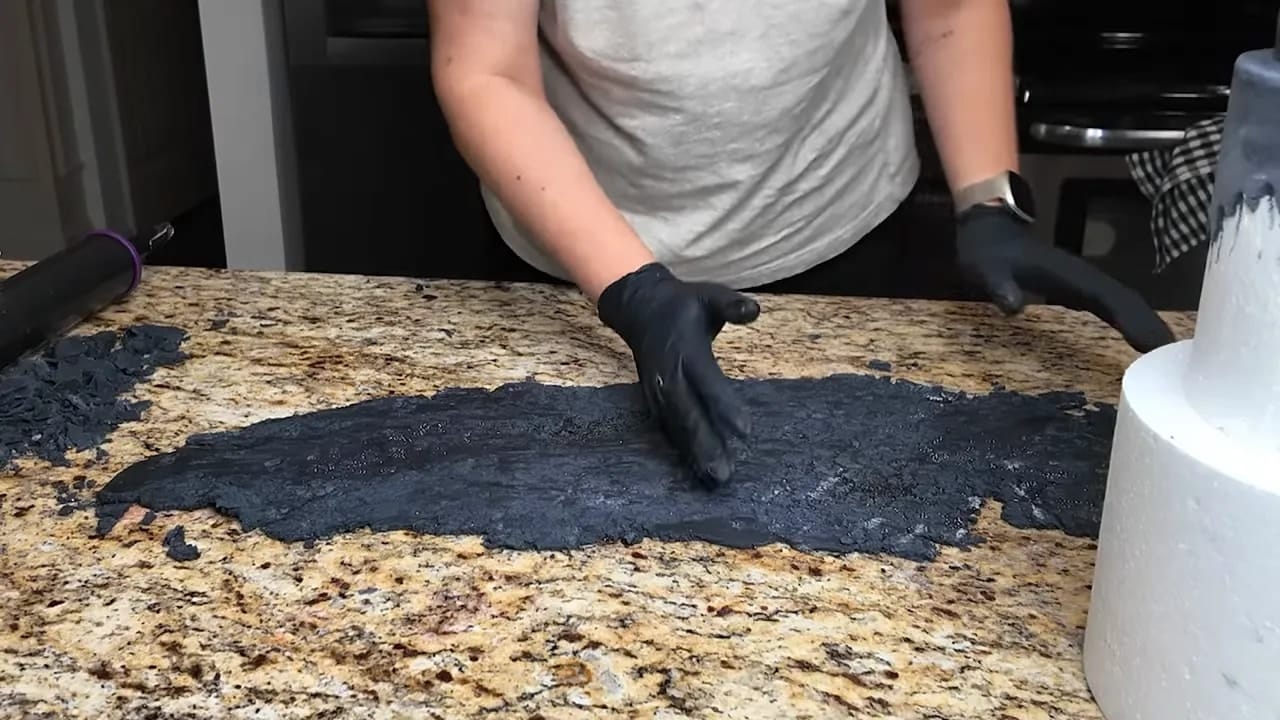
Rolling the fondant evenly
Use cornstarch on the surface and roll the fondant with a rolling pin fitted with 1/8-inch spacers.
That keeps the thickness even.
And for this design, the fondant does not need to be perfect.
A few imperfections are fine because the cake will later get bas-relief, texture, shimmer, and paint.
How to apply the smooth fondant base
To make the fondant stick to the dummy, use a light mixture of water and piping gel.
Not too much.
You want sticky, not melting.
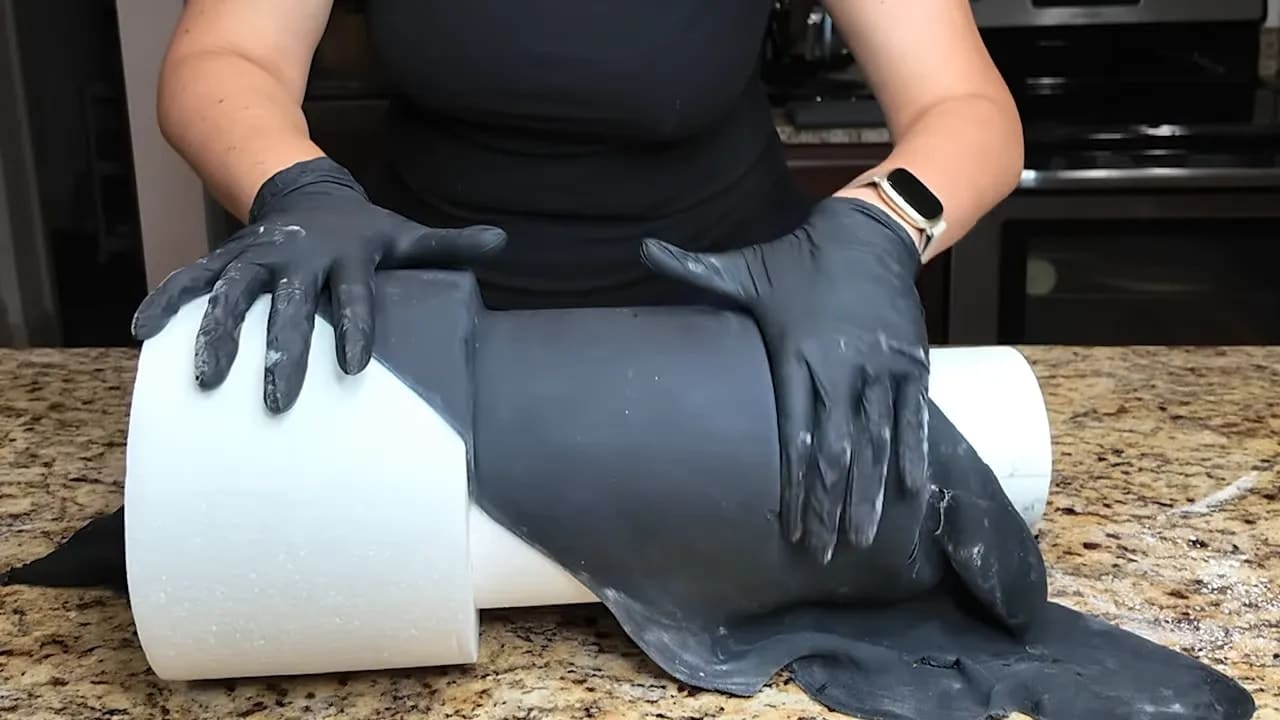
Then place the dummy cake on its side and bring the fondant over it.
This method helps cover tiers together instead of covering each tier separately, which saves fondant.
Once the fondant is roughly in place:
- trim the extra
- save the scraps for later texture
- smooth the surface
- connect the pieces
- add a touch more water and piping gel on edges if needed
- use a cake smoother to even out the texture across all levels
This smooth section becomes the face of the cake.
Let the first layer dry
After the smooth fondant is applied, let it dry.
In this cake, the first layer dries first, and then the rough stone texture is added later.
By the time the next step starts, the smooth area is set and ready.
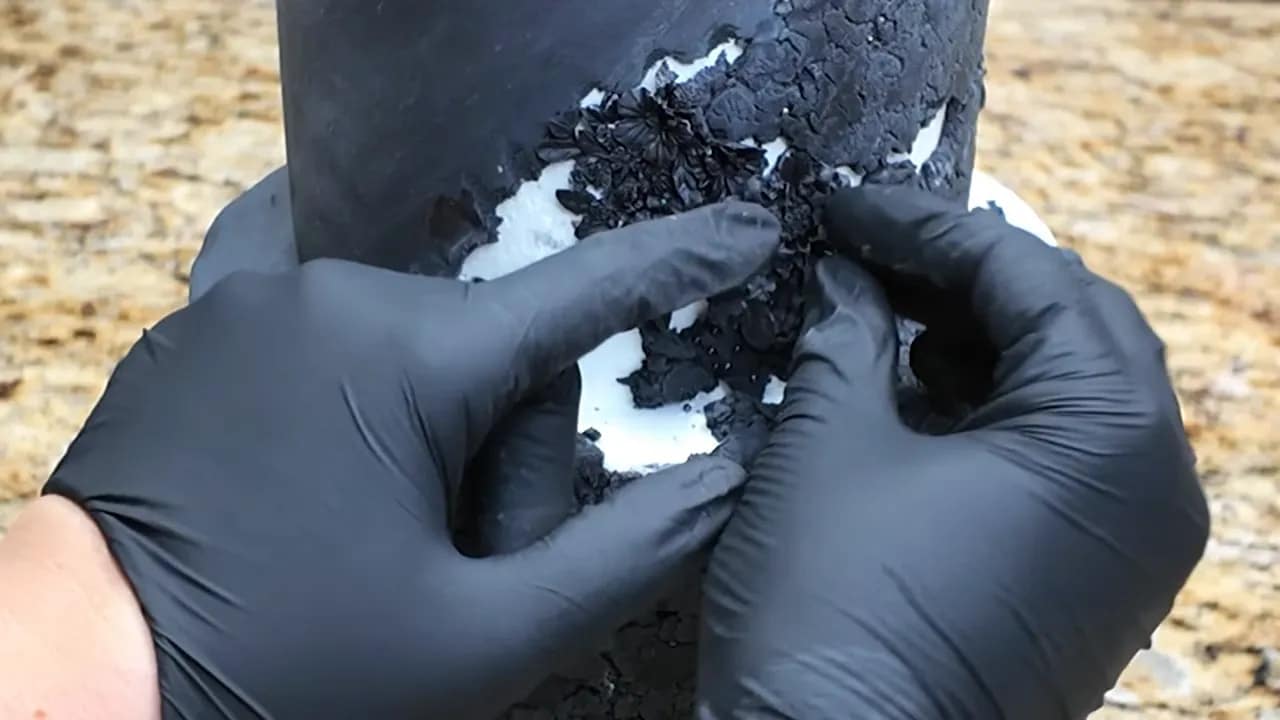
How to create the rough stone fondant texture
This is where the design becomes more modern and dramatic.
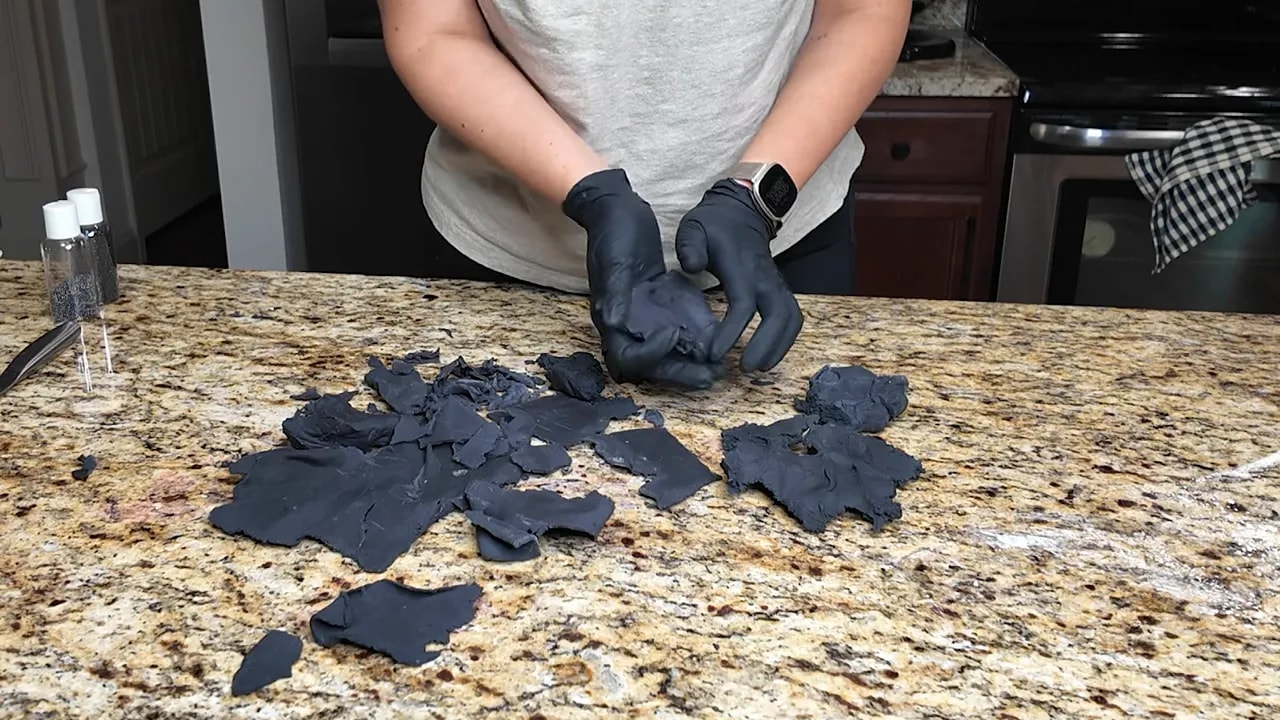
The rough texture is built with a mix of:
- dried fondant scraps
- soft black fondant
- black sanding sugar
- black nonpareils
The scraps are intentionally left out so some become dry and crumbly, while others are firmer outside and still soft inside.
Then fresh soft fondant is used to bring all of it together.
The goal is not to smooth everything out.
The goal is to keep those broken, stone-like parts visible.
Once the fondant and scraps are combined, roll it out again with the same 1/8-inch spacers.
Before rolling it fully, press sanding sugar and nonpareils into the surface so they become part of the texture.
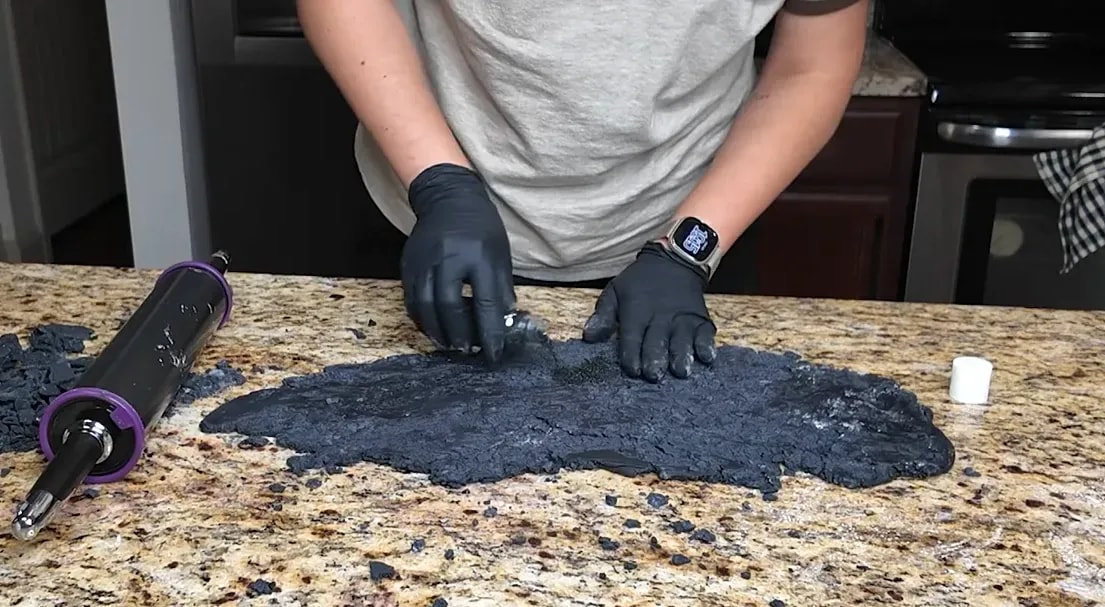
Applying the textured fondant without bulk
Cut the textured fondant into more manageable pieces if needed.
Then brush the back with the piping gel and water mixture and attach it to the dummy cake.
The important part here is to avoid overlap.
You want the same fondant thickness across the cake.
So instead of layering one area heavily over another, fit the pieces into the open sections around the smooth fondant.
Leave a little space between the smooth fondant and the rough stone fondant.
That space will be used for the bas-relief details.
At this point, the cake has two clear finishes:
- smooth black fondant
- rough stone texture
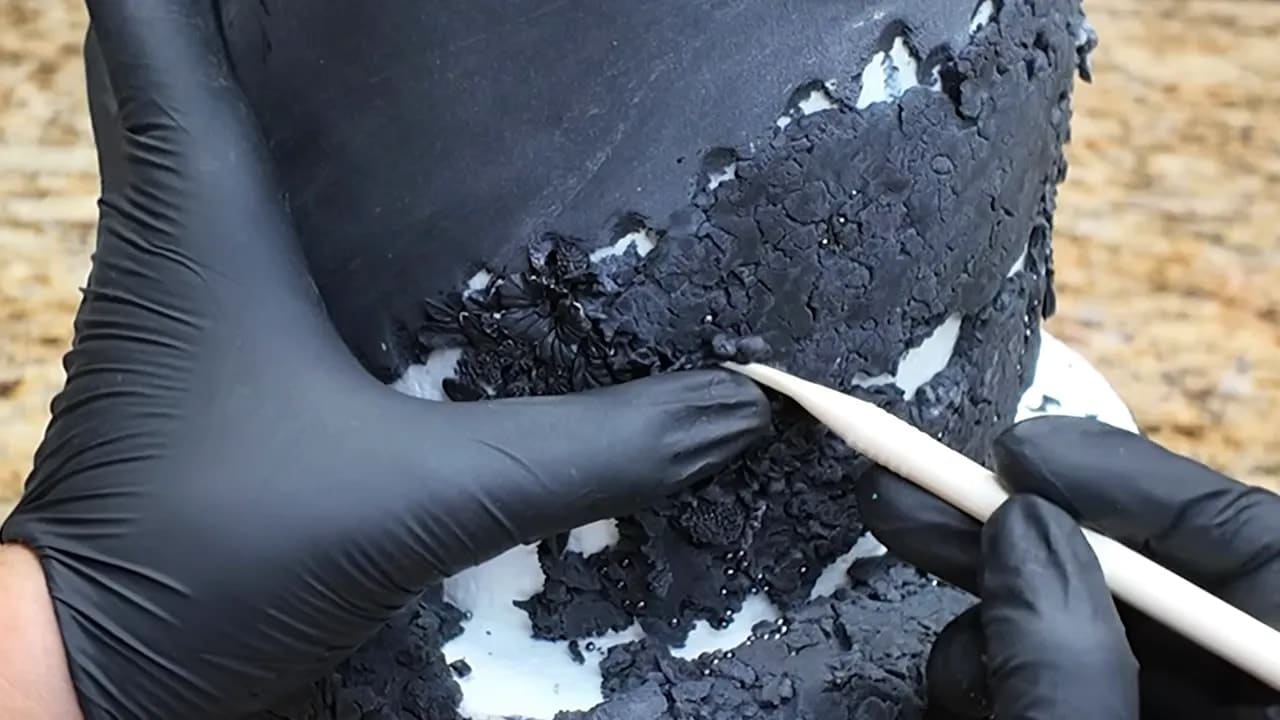
Adding bas-relief with molds
Now the seams become design.
That is the shift.
Instead of hiding the transition, you build into it.
For the bas-relief, use the same black fondant with more tylose powder added.
Take a small piece, roll it into a ball, and press it into a silicone mold.
The fondant should be stretched as thinly as possible in the mold.
That is what makes it feel like bas-relief instead of a thick applique.

Once the molded piece is ready:
- turn it out
- add a little water to the back
- place it into the indentations between textures
You can repeat this with larger floral pieces, leaves, or smaller flowers to build the design across the cake.
How to blend the bas-relief so it looks carved in
This step matters.
Because placement alone is not enough.
To make the design cohesive, use a Dresden tool to remove excess fondant and blend the edges into the cake.
Scrape away what you do not need.
Soften the seams.
Blend the relief into the base.
The effect should look like the design is carved out of the fondant, not just placed on top of it.
That is what gives this finish a more sculptural look.
And for a wedding cake designer, that kind of detail changes the whole level of the cake.
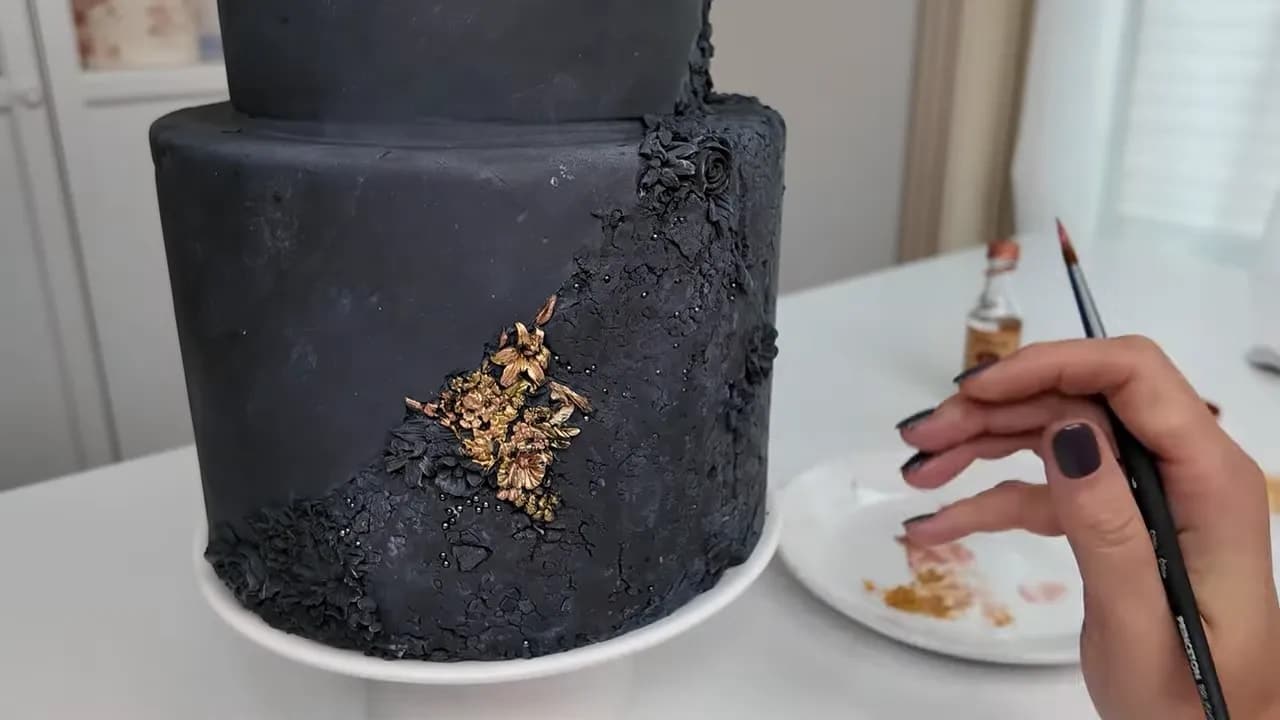
Painting and finishing the cake
Once the textures and bas-relief are in place, the last step is to paint.
Use:
- gold color
- different shimmer colors
Then attach the final decorations.
The result is a dark, bold, bright wedding cake design with contrast between smooth fondant, rough stone texture, and sculpted relief.
This method is useful because it combines several ideas in one design:
- a dummy cake for outdoor setup
- a smooth finish for contrast
- a rough stone texture for movement
- bas-relief details to hide seams and add elegance
- gold and shimmer for the final finish
It is a complete system.
Not just a texture.
And if you are a wedding cake designer, it gives you a way to build a modern statement cake that feels detailed, intentional, and strong.
Quick step-by-step outline
- Assemble the dummy cake with bamboo skewers and piping gel.
- Prepare black fondant and add a touch of tylose powder.
- Roll fondant to an even 1/8-inch thickness with spacers.
- Apply a light water and piping gel mixture to the dummy.
- Cover the cake and smooth the main face section.
- Let the first layer dry.
- Combine fondant scraps and fresh fondant for rough stone texture.
- Add black sanding sugar and nonpareils to the textured fondant.
- Apply textured fondant to open sections without overlap.
- Leave space between textures for bas-relief.
- Mold thin fondant pieces with added tylose powder.
- Attach and blend them with a Dresden tool.
- Paint with gold and shimmer colors.
- Attach final decorations.
Final thought
You do not need everything to be smooth to make it beautiful.
Sometimes contrast is the design.
Sometimes seams become the best part.
And sometimes the smartest move a wedding cake designer can make is choosing a dummy cake, building strong texture, and creating a finish that holds up beautifully for the event.
")

")