Wafer paper flowers are edible cake decorations made from thin sheets of wafer paper, an edible material of potato starch, water, and oil. The paper is softened with a glycerin based conditioner, then cut, colored, and shaped into petals. Unlike gum paste flowers, they are lightweight, translucent, faster to make, and last for years without fading.
When I started working with wafer paper in 2016, I was living in Florida, where the humidity is near 100%. Nothing I made out of gum paste could survive it. Wafer paper could. That is where this whole journey started.
Since then, I have built my work, my book, and my teaching around this one material. Below is the full foundation, the same thing I teach inside the Wafer Paper Academy. Nothing held back. Read it through once, then come back to the section you need when you are at your table.
What is wafer paper?
Wafer paper is an edible material that looks like printer paper but is completely safe to eat. It is made of potato starch, water, and oil, and it is mostly flavorless, so it never changes the taste of your cake.
There are two types, and choosing the right one is the first thing that makes your life easier.
Single thickness wafer paper is around 0.30 mm. It has two different sides, one smooth and shiny, the other lightly textured, which we call the bumpy side. This is my go-to for flowers and foliage because it is soft and easy to shape.
Double thickness wafer paper is around 0.60 mm and is smooth on both sides. It is better suited to painting and flat, fondant style appliqué designs rather than delicate petals.
Wafer paper vs gum paste
This is the question almost every beginner asks, so let me answer it plainly. Neither is better. They are different tools for different jobs.
Wafer paper is lightweight and translucent, with a soft, painterly look. It needs no overnight drying between layers, so you can make a flower in a fraction of the time. It lasts for years, the color does not fade, it handles humidity well once conditioned, and it is inexpensive, roughly $25 for 100 sheets. It is the easiest place to start.
Gum paste is heavier and more sculptural, and it is capable of fine botanical precision. It needs longer drying times, its colors can fade over time, and it is more sensitive to humidity. It also carries a steeper learning curve and more cost.
If you want a realistic flower quickly, and you want it to still look beautiful months later, wafer paper is where I would start you.
What you need to get started
You probably already own half of this.
Start with what you have.
The tools can grow as you do.
- Single thickness wafer paper, around 0.30 mm, for flowers and foliage
- Sharp scissors. Scrapbooking scissors work beautifully because they hold a clean edge
- AC Tonic, a glycerin based wafer paper conditioner
- Wafer paper glue, made from wafer paper scraps melted in water
- Cornstarch, to keep your paper from melting
- Airbrush colors or petal dust
- A flat watercolor brush, which holds moisture well
- A toothpick or thin bamboo skewer
- Piping gel, to attach finished flowers to the cake
- Optional, for flowers: paper-covered floral wire and a petal veiner
The conditioner that changed everything
Here is the part most beginners get wrong, and it is not their fault. Wafer paper is dry and brittle on its own. To shape it without cracking, you have to soften it first.
For years, decorators reached for vodka. I started there too. I did not love it. I do not drink, I was making flowers for children’s cakes, and the alcohol left my petals dry and brittle almost immediately. The texture was wrong.
So I looked at what was already working. Every airbrush color and gel color I owned contained glycerin. Glycerin is a humectant. It is the same ingredient in your hand cream and your face moisturizer, the thing that keeps skin soft and supple. It does exactly the same for wafer paper.
That is how AC Tonic was born. It is a simple glycerin based conditioner, just glycerin and distilled water, and it is the one thing that lets you color, soften, and shape a petal in a single pass. I give the exact recipe away for free.
How much conditioner to use
This is the skill that takes one afternoon to learn. Saturate your flat brush, then scrape it on the side of your palette until it stops dripping. That is the sweet spot.
If you see dark puddles forming on the petal, you have too much moisture and the paper will melt. If parts stay pale and stiff, you have too little. You want an even, all over coverage, working quickly with light but firm strokes.
How to make your first wafer paper flower
This is the flower I always start people on. No wires, no templates, no cutters. Just a few sheets of wafer paper and a piece of candy for the center. You can have a finished flower in about half an hour.
Step 1. Cut the petals
Cut your wafer paper into petals in a variety of random sizes. Cut on a diagonal, and only about halfway through, so each petal keeps some dimension. Do not aim for perfect. One sheet gives you around fifteen petals.
Step 2. Color and shape each petal
Mix a few drops of airbrush color into your AC Tonic. Brush it onto a petal until the paper turns soft and flexible, then bring the two ends together, overlapping into a triangle shape. For more movement, twist the ends gently around a toothpick so it reads like a real petal.
Step 3. Let the petals dry
Set them aside until completely dry, about five to ten minutes. Make your petals in a few different shades so the finished flower has depth.
Step 4. Assemble the flower
Sort your petals by size. Put a small amount of wafer paper glue on one side of a petal and stack any three together for the first layer. Then add more petals of different sizes on the back, pressing gently to give the flower shape.
Step 5. Add the center
Use the smallest dab of piping gel to attach a piece of candy in the middle. Any candy works, which makes this flower perfect for a birthday cake, a holiday, or a wedding.
Step 6. Attach it to the cake
Brush a little piping gel on the back of the flower and press it onto a fondant-covered cake. Most of the time it holds on its own. If it slips, anchor it with a toothpick somewhere it will not show.
How to stop wafer paper from melting
Wafer paper is sensitive to moisture. That is its one weakness, and it is completely manageable once you understand it. The fix is cornstarch.
After you condition a petal, brush a light layer of cornstarch over it before you shape it. If you are working in high humidity, putting flowers in the fridge, or setting a cake outdoors, be generous. I have flowers on my table that have survived years of summer humidity and winter dryness without a single change.
Balance is everything. In very dry air, lean on a little more glycerin in your conditioner so the petals stay supple. When melting is the worry, lean on more cornstarch.
If you are placing wafer paper flowers on a buttercream cake, add a thin barrier of melted cocoa butter or candy melts on the back of the flower where it meets the frosting. That barrier keeps the moisture in the buttercream from softening the paper.
How to color wafer paper
There are a few ways to add color, and the right one depends on the look you are after.
Pre colored wafer paper is the quickest to buy, but it can be hard to find the exact shade you want, so it is not my first choice.
An edible printer lets you print any design or pattern straight onto the paper, which is useful for very specific artwork.
Dry petal dust is the fastest hand method. Brush it onto the smooth side of the paper for a soft, matte color.
Airbrush with AC Tonic is how I color larger areas and greenery. Mix your color into the conditioner and spray it on.
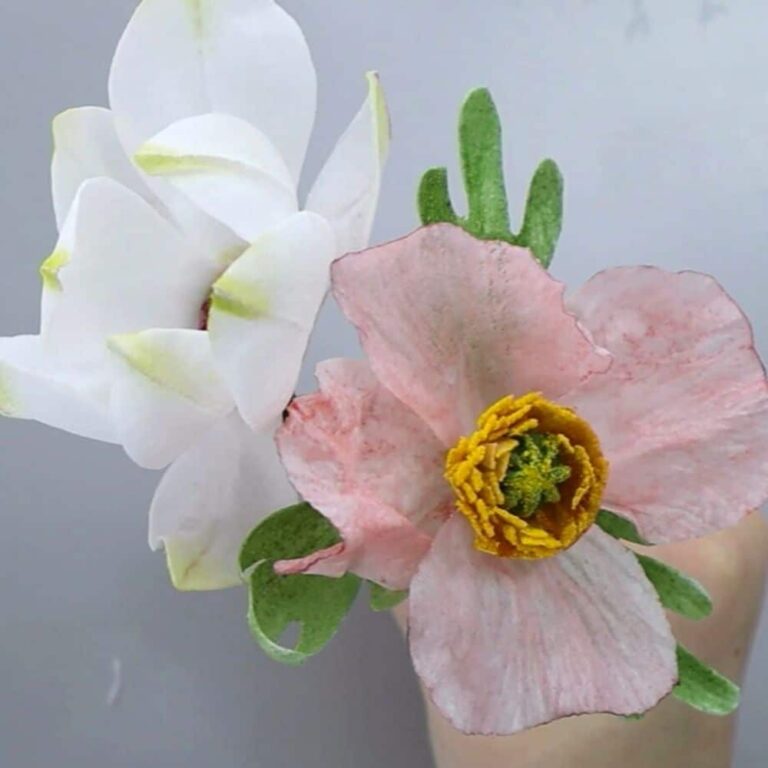
My favorite method is a flat brush with AC Tonic and color. It gives me the most control, and it lets me color and shape a petal in the same moment. That is the technique you saw in the flower above.
How to store your wafer paper flowers
Let your flowers dry completely first. Then store them in a food grade plastic container with a few silica gel packets tucked inside. The silica manages the swing between dry and humid air so nothing distorts.
Stored this way, wafer paper flowers last for years. The colors will not fade, even in direct sunlight, which is something sugar flowers simply cannot promise. I keep boxes of extras and reuse them across different cakes.
F.A.Q.
What is wafer paper made of?
Wafer paper is a thin, edible material made of potato starch, water, and oil. It looks like printer paper but is fully edible and mostly flavorless, so it does not change the taste of your cake.
Are wafer paper flowers edible?
Yes. Wafer paper flowers are 100 percent edible. Everything used to make them, including the paper, conditioner, color, and glue, is food safe.
How long do wafer paper flowers last?
They can last for years. Stored properly, the colors do not fade, even in direct sunlight, which is something sugar and gum paste flowers cannot promise.
How do you store wafer paper flowers?
Let the flowers dry completely, then store them in a food grade plastic container with a few silica gel packets. The silica manages humidity so the flowers stay intact for years.
Why does my wafer paper melt, and how do I stop it?
Wafer paper is sensitive to moisture. After conditioning a petal, brush on a light layer of cornstarch before shaping it. Be generous with cornstarch in high humidity, in the fridge, or outdoors. On buttercream, add a thin barrier of melted cocoa butter or candy melts on the back of the flower.
Can you put wafer paper flowers on a buttercream cake?
Yes. Brush a thin layer of melted cocoa butter or candy melts on the part of the flower that touches the buttercream. That barrier keeps moisture from the frosting from softening the paper.
What is the best wafer paper thickness for flowers?
Single thickness wafer paper, around 0.30 mm, is best for flowers and foliage because it is soft and easy to shape. Double thickness, around 0.60 mm, is better for painting and flat appliqué designs.
Why use glycerin instead of vodka to soften wafer paper?
Glycerin is a humectant, the same ingredient found in hand cream and airbrush colors, and it keeps wafer paper soft and flexible. Vodka tends to leave petals dry and brittle, and it adds alcohol to a decoration that may be eaten by children.
Do I need years of practice to make beautiful wafer paper flowers?
No. With a good conditioner and a clear method, most people make a few practice petals and have a beautiful flower by the third or fourth try. You can go from never having touched wafer paper to a finished flower in a day or two.
What tools do I need to start making wafer paper flowers?
Wafer paper, sharp scissors, a glycerin based conditioner, wafer paper glue, a flat brush, and something to color with. Most beginners already own much of this. You can add wire and a veiner later for layered, lifelike flowers.
About Anna Astashkina
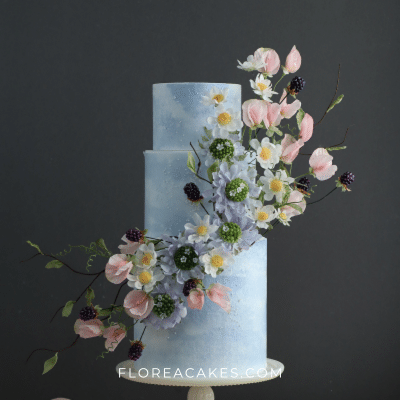
Anna is a pastry chef, award-winning wedding cake designer, and the founder of Florea Cakes, formerly known as Astashkina Cakes. She is recognized as a pioneer of wafer paper florals in cake decorating and is the author of the All-In-One Wafer Paper Guide.
Through Florea Cakes, she teaches bakers how to design modern wedding cakes with edible wafer paper flowers.
Ready to make modern lifelike wafer paper flowers for wedding cakes?
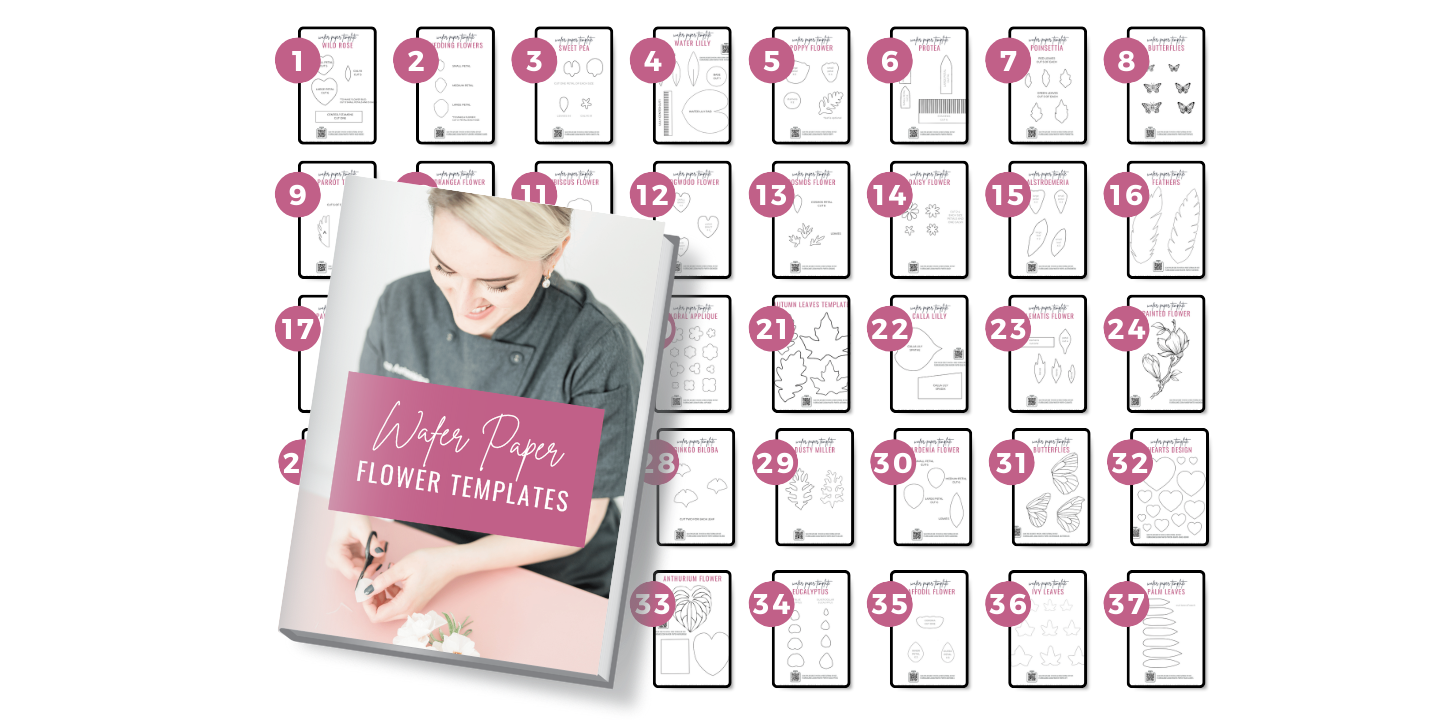
If you want to make flexible, weather-proof flowers like ranunculus, roses, and peonies, with my signature templates and step by step guidance, that is exactly what I teach inside the Wafer Paper Academy.
Explore the Wafer Paper Academy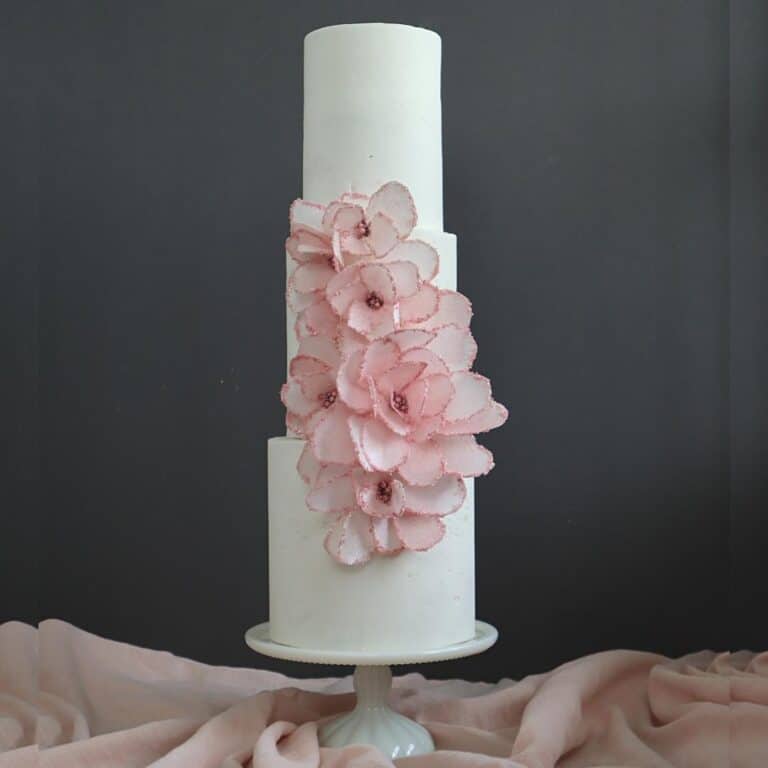
")

")